I already wrote about Docker, and today I will present different solutions to host your lovely docker containers. If you want to know more about Docker, you can read my previous post on this subject.
Dedicated servers
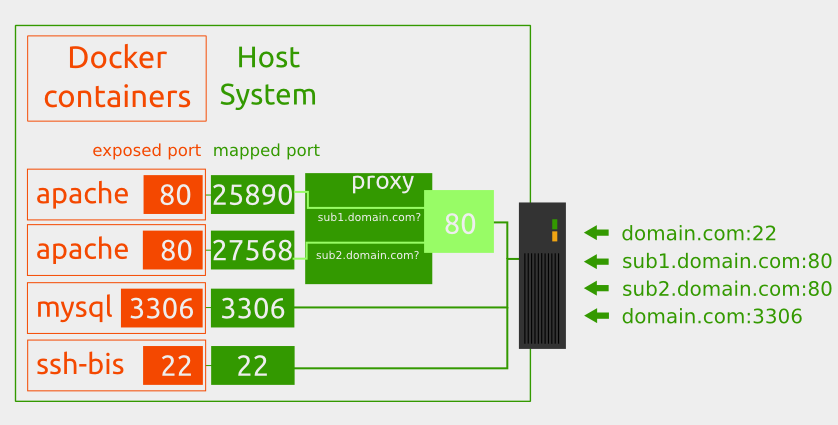
If you already have a dedicated server (hosted in a data center or just a home server), you can just install docker on it, and setup a proxy (nginx, apache, etc.) to redirect the requests to the right local port according to the domain.
You can do this in a static way or use the ambassador pattern as presented here. The static method is the simplest if you only manage a few containers, but if you want a robust environment to deploy a large amount of containers, you should have a look on how to deploy ambassador containers.
Instructions for installing Docker on several distributions are available in the official documentation. For instance, on Ubuntu 14.04, you can install it directly from the package manager:
$ sudo apt-get update
$ sudo apt-get install docker.io
$ sudo ln -sf /usr/bin/docker.io /usr/local/bin/docker
Then, you can build and run your containers, as explained in my previous posts. If you don’t have any firewall blocking the port, your containers should already be accessible from the net.
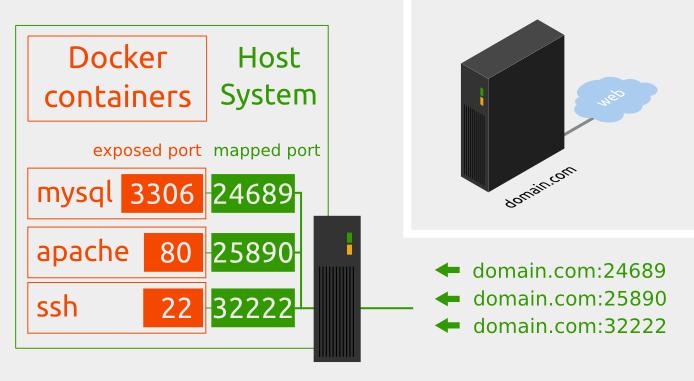
Nevertheless, you may want to access your containers and their service by the default port. You can do this with a simple HTTP reverse proxy, or if you have only one container running for a specified service, you can map them directly to the host default port for this service. The command:
$ sudo docker run -p 22:22 ssh-image /usr/sbin/sshd -Dwill launch the container based on image ssh-image and will map the port 22 of the container to the port 22 of the host.
I won’t enter into technical details in this post, but you can find a lot of resources on the net about how to setup a reverse proxy..
This solution is maybe the first one you will try, at least for experiencing with docker.
** Pros and cons:**
Difficulty: Even if installing Docker isn’t difficult, maintaining a dedicated server could really end up in many headaches. You will have to manage upgrades, security issues, problems and configurations by yourself. Don’t underestimate this part, especially if it’s not your specialty.
Scalability: You’re on your own. If you already thinked this through and designed a nice solution to scale your services, it can work pretty good. Or fail terribly.
Price: If you use your server 100% of its capacity, this may be the cheapest solution. Dedicated server are quite expensive, but you will also have a large amount of power to manage several services on the same machines.
Virtual Machines and VPS
This is exactly the same principle than before, except that you are running on a virtual machine. If you don’t need the power of a dedicated machine, this solution gives you (more or less) the same freedom as the previous one but for a really cheaper price. This is also true with any IAAS solution (Infrastructure as a Service, for instance: Amazon EC2, Google Compute Engine, etc.). If you use a PAAS (Platform as a service) solution, you have to check if you can run docker containers on it, which, for the moment, is unlikely.
Pros and cons:
- Difficulty: The same as the dedicated server; you will have to setup the platform by yourself.
- Scalability: You may be able to find it a little bit easier to scale with VM, but you will have to think your scalabitlity solution by yourself, just like with dedicated.
- Price: Cheaper than a dedicated server, as you only use the power you need. You may even find IAAS solution that let you pay according to the cpu power used or the time your server is up (per minutes).
DigitalOcean
DigitalOcean is a hosting company, that offers virtual machines with preinstalled environments designed for developers.
You can setup really easily what they call a droplet, which is a KVM instance running on SSD hard drive with more or less CPU and storage depending on the pricing solution.
What is cool is that they offer to setup machines with docker already installed. The design of the website is clear and nice, and the pricing policy flexible.
Let’s see how to create a droplet with Docker installed.
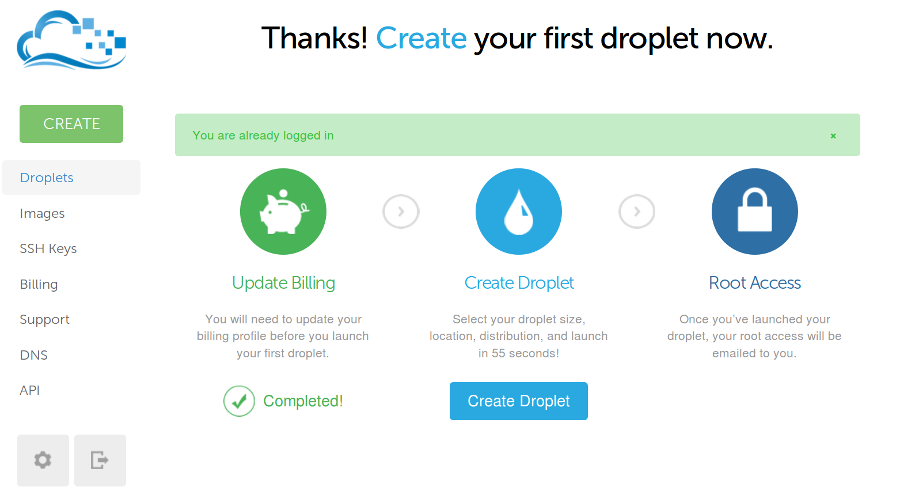
First of all Sign up. They will ask you your credit card information, so that you can create droplet as soon as the process is finished.
Then log in, and click on Create Droplet.
You give a name to the droplet (the name doesn’t really matter, it’s just for you):

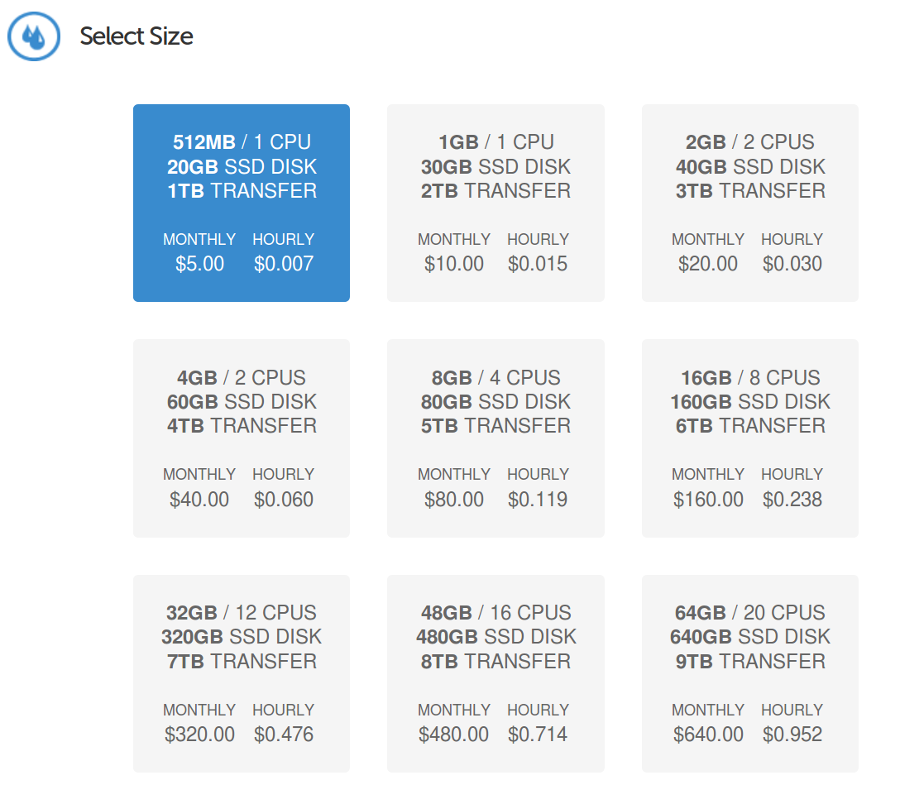
And select the type of droplet you need. As you can see, prices start at 5$/month or 0.007$/hour for a basic configuration (1 CPU/512GB RAM/20GB SSD) to 640$/month or 0.952$/hour for the most powerfull configuration (20 CPU/64GB RAM/640GB SSD). Let’s select the basic configuration: you can delete it whenever you want after this test, and it will just cost a few cents.
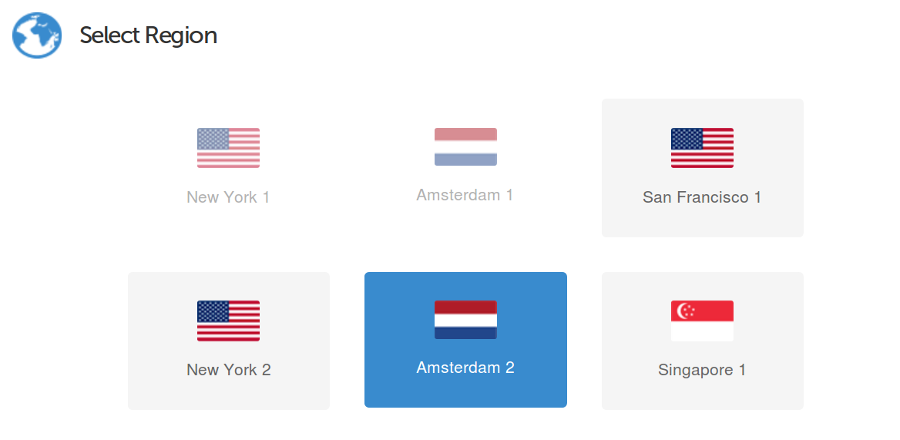
You select the region of your droplet. For the moment are available: New York, San Francisco, Amsterdam and Singapore.
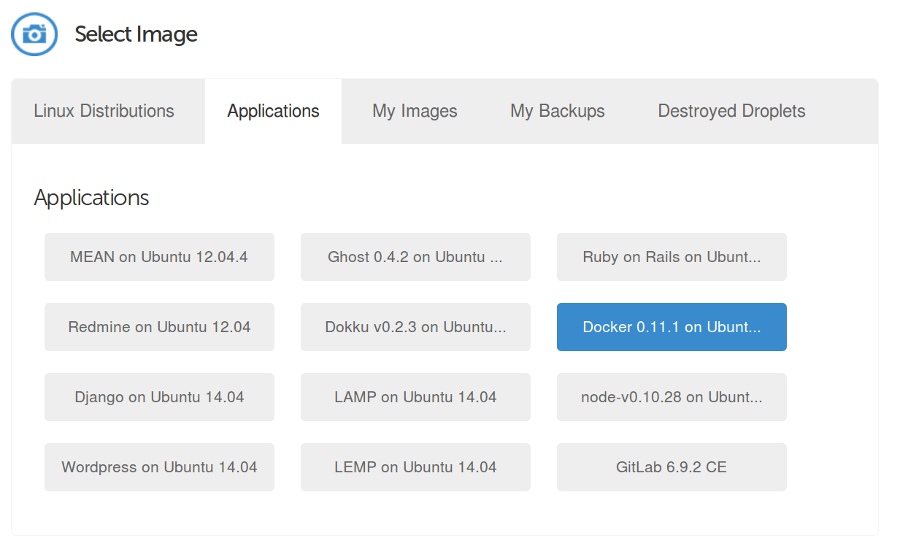
You can install an OS distribution but also an image with applications already installed. Let’s click on Applications and select Docker. They provide the latest Docker release available, which is nice.
Finally, you can choose to add a previously saved SSH Key, if you have one.
Once everything is selected, click Create Droplet.
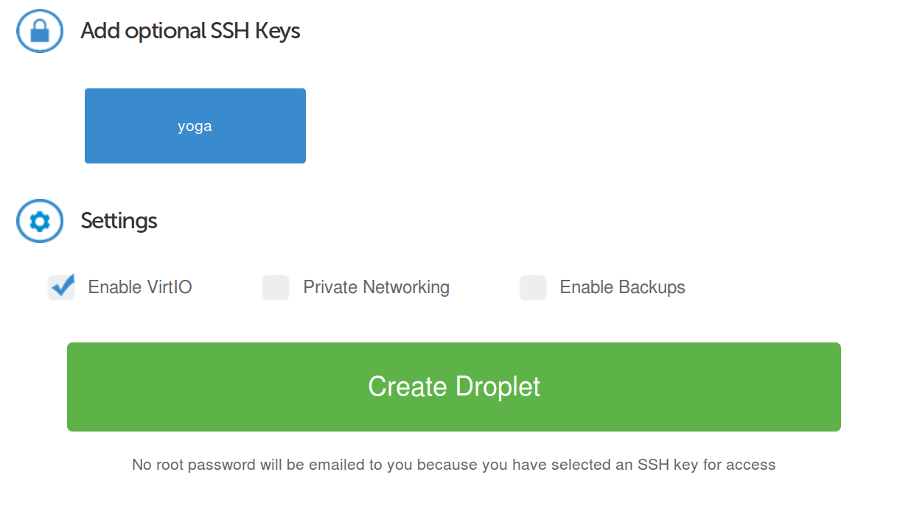
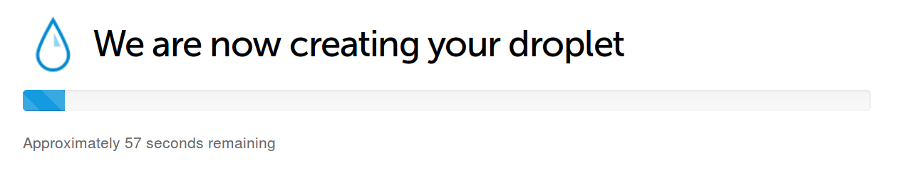
The Droplet is set up in less than a minute. The root password will be emailed to you if you don’t have associate any SSH Key with the droplet. The IP of the machine is displayed just after its creation.
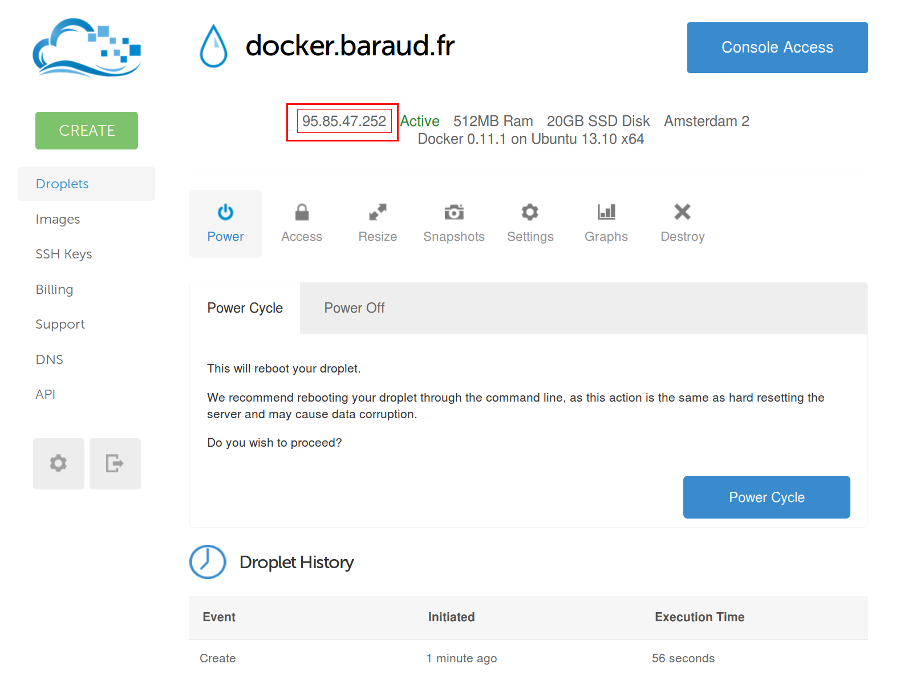
You can ssh into the machine and launch directly your docker containers!
DigitalOcean provide a nice and clear interface, you can interact with it through their REST API, the prices are cheap and flexible.
Tutum
If you are really looking for a platform dedicated to Docker, there is Tutum. Tutum is a “Container-as-a-service”, and is the simplest solution to run docker containers that I’ve seen.
Let’s see how to setup and run a container in Tutum.
First of all, sign up, you will notice that no credit card information will be asked. Indeed, you can create your first container for free for a month, which is a great way to test the platform. You’ll see some warnings alerting that Tutum is still in beta, but Docker is also still in beta, so it shouldn’t be an issue, as you shouldn’t use Docker in production for the moment.
Once you are logged in, click on Launch your first application.

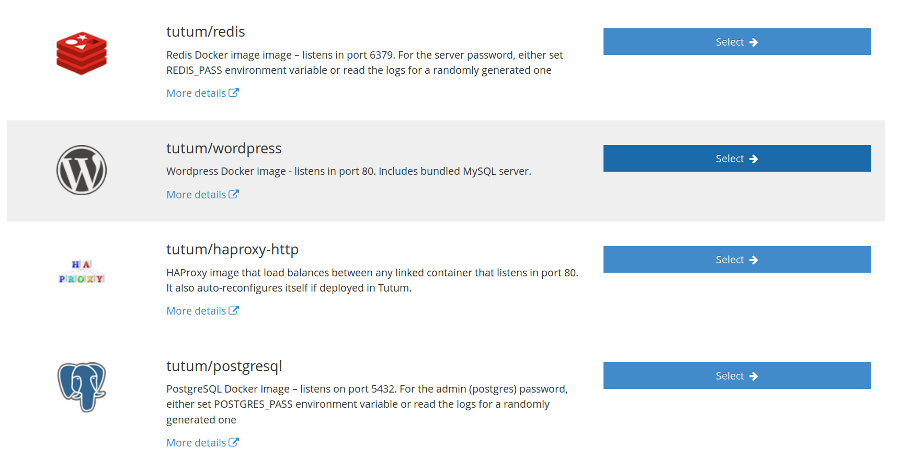
You can choose one of the preset docker images to start with…
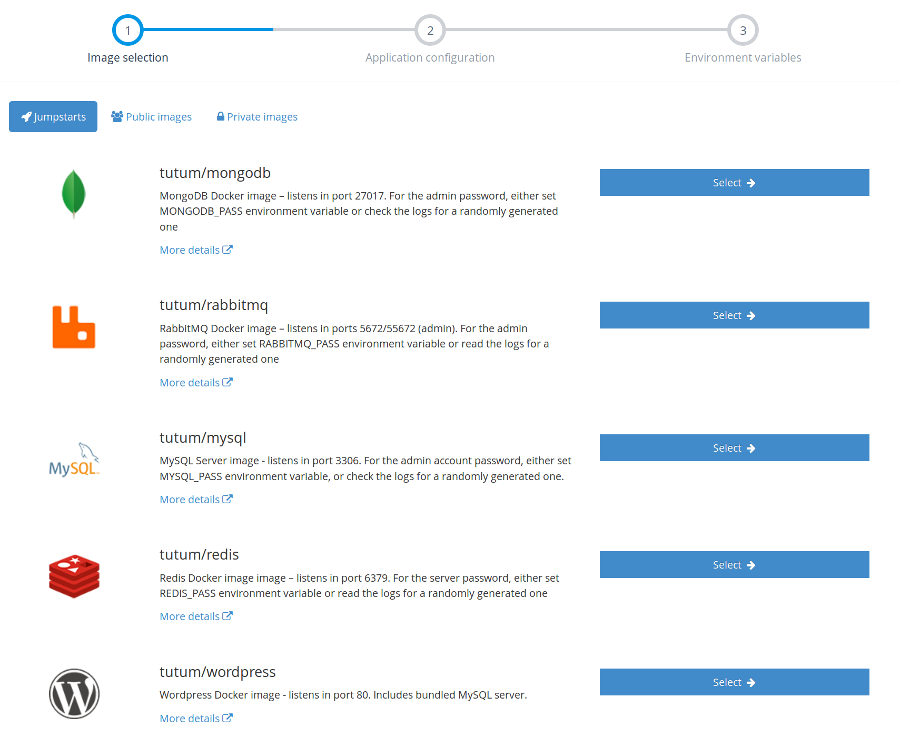
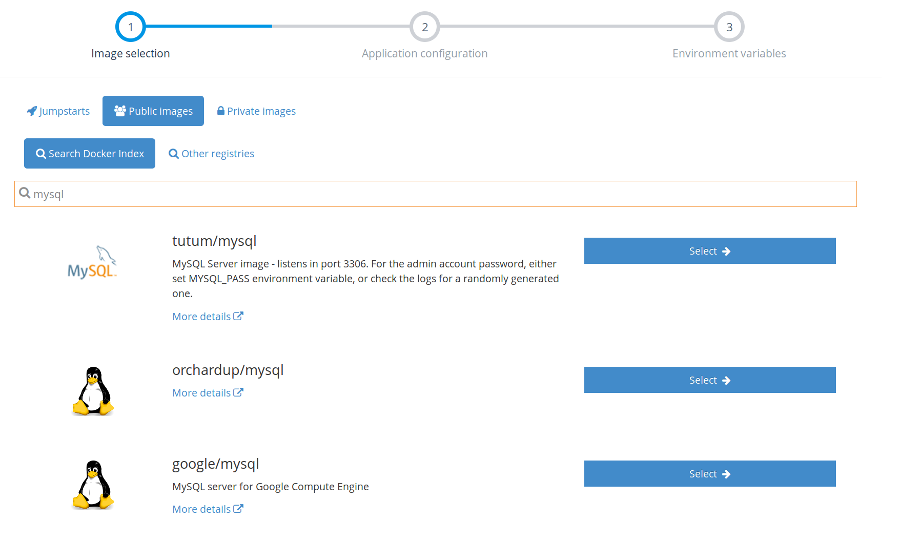
or choose from the official docker index or any other registry.
And if you want to keep your images private, Tutum provide a private registry where you can push your docker images!
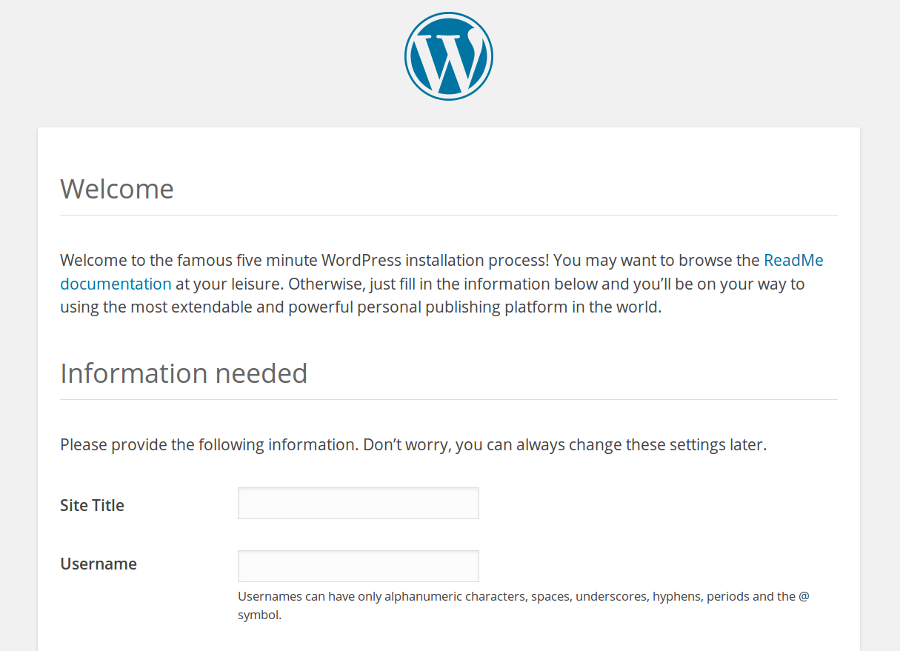
Let’s try the wordpress default image!
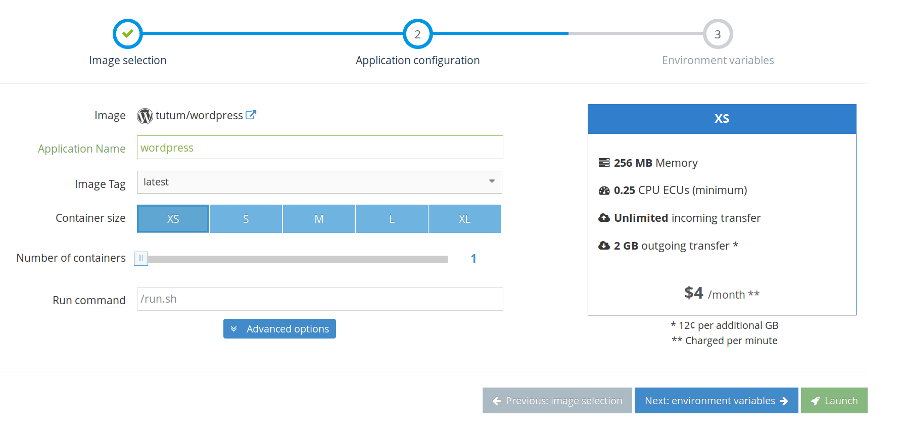
Once selected, you can choose a name for your container, the tag (version) of the image, and the resources allocated to the container. It goes from $4/month (0.25 CPU ECU/256MB) to $64/month (4 CPU ECU/4GB Memory). Let’s try the XS Solution (free for a month). Click on Launch.
In just a few seconds, the container is setup and ready to use.
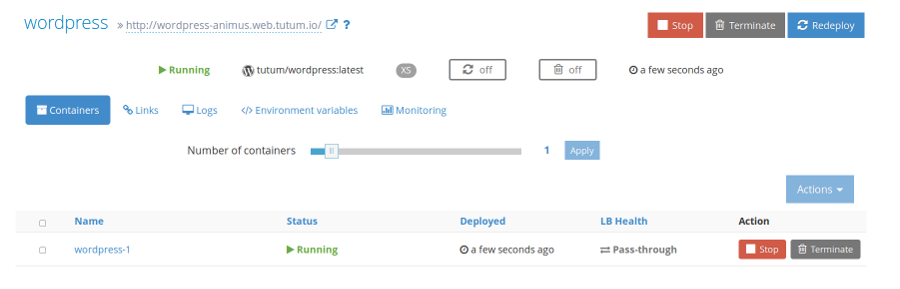
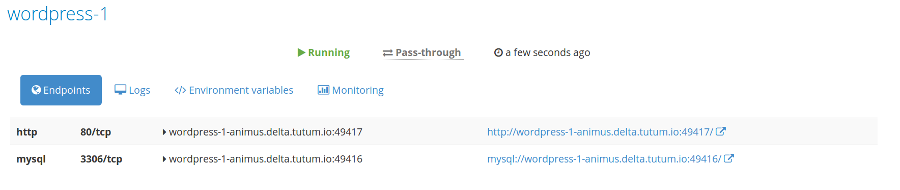
When you click on your container, you find directly the exposed port, and a link to the application.
If you click on it, tadaaam, your site is ready and waiting for you.
With Tutum, you manage directly your docker containers, without worrying about any infrastructure issue. It provides dedicated screen for Logs, Environment variables and monitoring. It also provides a REST API to interact with your containers. And if you want to use a custom domain, You can also setup it when you create your container.
The interface is neat and clear, and you can scale your services really easily. The prices are fair regarding the services they provide (scaling, load balancing, web proxies). It is really enjoyable to deploy so easily any docker images in the cloud in a few seconds.
And you, how do you deploy your docker containers?